
Aeropress Coffee Instructions: A Comprehensive Guide
Welcome to the ultimate guide to brewing exceptional coffee with the AeroPress! This comprehensive resource will equip you with the knowledge to master this versatile coffee maker. From understanding the basics to advanced techniques, prepare for a delightful brewing journey.
What is AeroPress?
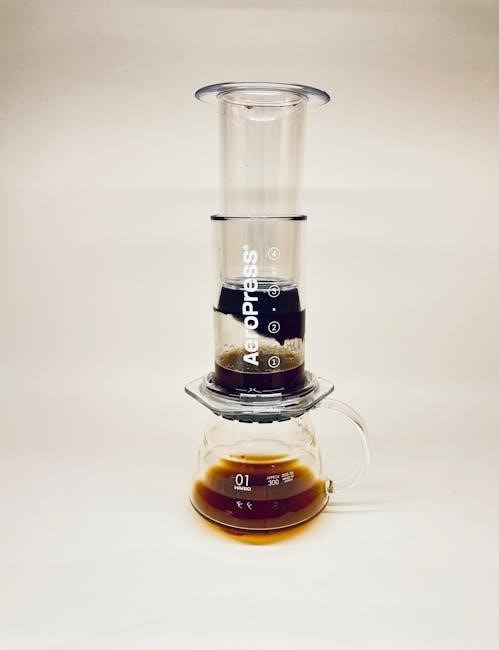
The AeroPress is a unique coffee brewing device celebrated for its simplicity and ability to produce smooth, rich coffee. Unlike traditional methods, the AeroPress utilizes a manual pressure system, allowing for a faster extraction time. It’s comprised of a chamber, plunger, and filter cap. This innovative design enables coffee enthusiasts to create a concentrated brew, similar to espresso, but with less acidity and bitterness.
The AeroPress’s compact and durable construction also makes it ideal for travel, ensuring a delicious cup of coffee wherever you go. Its versatility also allows for experimenting with various brewing parameters to cater to individual taste preferences.
Whether you are a beginner or experienced coffee lover, the AeroPress offers a rewarding and customizable brewing experience.
AeroPress vs. French Press and Pour-Over
The AeroPress, French Press, and Pour-Over methods each offer unique coffee experiences. The French Press, an immersion method, yields a full-bodied brew with more sediment. Pour-over, a filtration method, creates a cleaner, brighter cup. The AeroPress combines aspects of both, using pressure to force coffee through a filter, resulting in a smooth, concentrated brew with less sediment than a French Press.
Compared to the French Press, the AeroPress offers a faster brewing time and easier cleanup. Compared to pour-over, it’s more forgiving and less reliant on technique. The AeroPress also provides greater control over variables like pressure and steeping time.
Ultimately, the best method depends on personal preference, but the AeroPress stands out for its versatility, ease of use, and ability to produce consistently delicious coffee.
Essential Equipment for AeroPress Brewing
To brew fantastic AeroPress coffee, gather your essentials: the AeroPress itself, a grinder for medium-fine grounds, filters, a kettle for hot water, and optionally, a scale for precision, ensuring a perfect cup.
AeroPress Coffee Maker
The AeroPress coffee maker is a device used to quickly and easily brew coffee. It’s known for its simplicity and ability to produce smooth, rich coffee with low acidity. It is a low-cost, high-quality coffee gear, and is used every morning by coffee lovers. The AeroPress is an immersion style coffee maker, where finely ground coffee is immersed in the chamber with a short brew time. It is a California-based, Kickstarter answer to modern coffee demands. The Aeropress has amassed a devoted following, and not only is it fun to use, it’s easy to use.
The AeroPress Original is suitable for everyday use at home and is scalable for cafés delivering the same unparalleled coffee experience. It is a simple way to make a great one-off cup of coffee, especially when travelling!
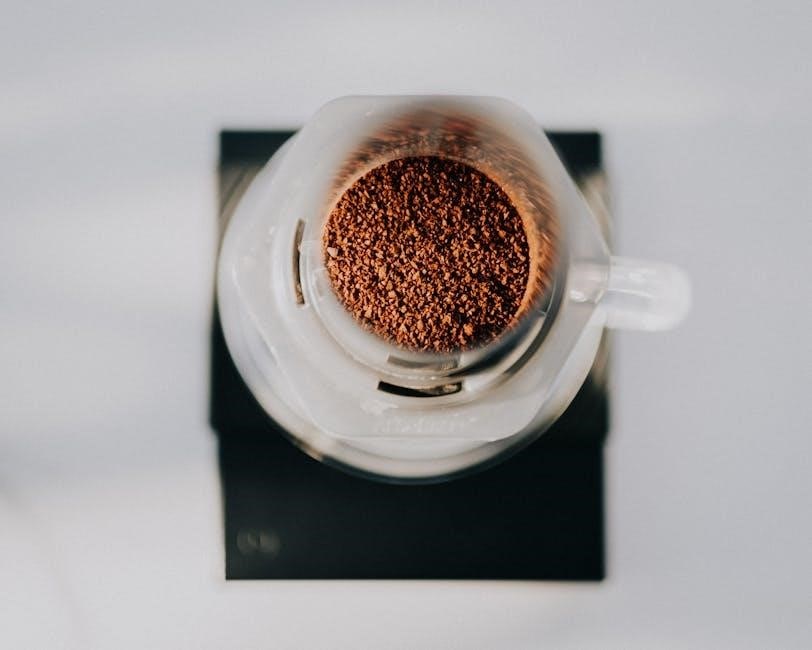
Coffee Grinder and Grind Size (Medium-Fine)
A quality coffee grinder is essential for achieving optimal extraction with your AeroPress. Using freshly ground beans unlocks the full potential of your coffee, delivering a more vibrant and flavorful cup. For AeroPress brewing, a medium-fine grind size is generally recommended, about as fine as table salt. This consistency allows for proper saturation and extraction during the brewing process.
A consistent grind ensures even extraction, preventing both under-extraction (sourness) and over-extraction (bitterness). Experimenting with slightly coarser or finer grinds can help you fine-tune your brew to match your taste preferences. A burr grinder is preferred over a blade grinder for its ability to produce a more consistent and uniform grind.
Filters (Paper or Metal)
The AeroPress utilizes filters to separate the coffee grounds from the brewed coffee, resulting in a clean and sediment-free cup. Two primary filter options are available: paper and metal. Paper filters are disposable and provide excellent filtration, trapping most of the oils and micro-fines. This results in a brighter, cleaner cup with less body.
Metal filters, on the other hand, are reusable and allow more oils and fines to pass through, resulting in a fuller-bodied and richer cup of coffee. Metal filters require more thorough cleaning but offer an environmentally friendly alternative to paper filters. Experiment with both types to determine your preferred flavor profile and brewing experience. Some users prefer to rinse paper filters before use.
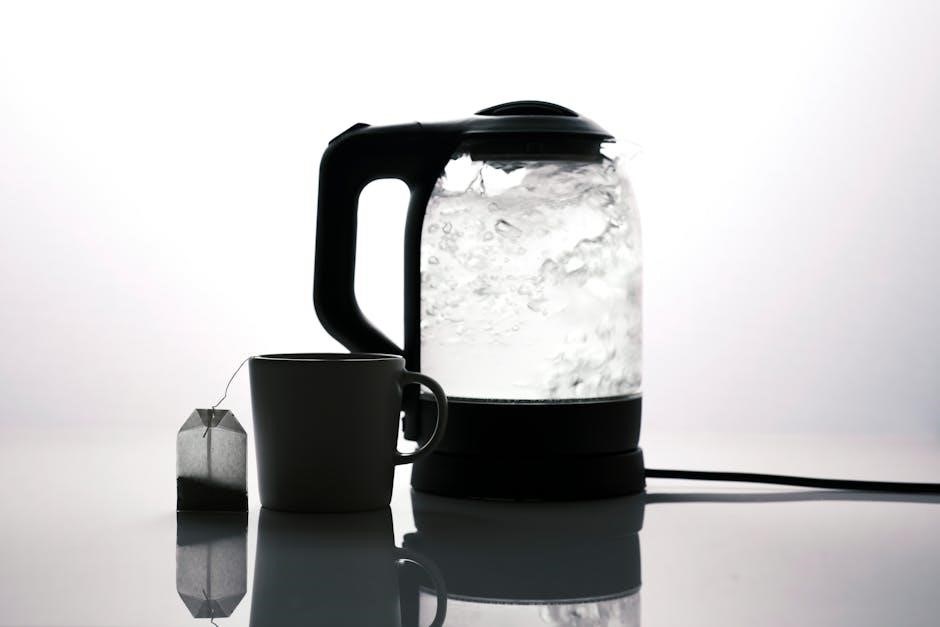
Kettle and Water Temperature
A reliable kettle is essential for heating water to the optimal temperature for AeroPress brewing. A gooseneck kettle provides greater control over pouring, which is beneficial but not strictly necessary. Water temperature plays a crucial role in coffee extraction. For AeroPress, a temperature between 175-185°F (80-85°C) is generally recommended.
Using water that is too hot can result in bitter flavors, while water that is too cool can lead to under-extraction and sourness. If you don’t have a thermometer, bring the water to a boil and let it sit for about a minute before pouring. Experimenting with water temperature can help you fine-tune your brew to achieve the perfect balance of flavors. Filtered water is always preferable.
Scale (Optional but Recommended)
While not strictly required, a digital scale significantly enhances the precision and consistency of your AeroPress brewing. Using a scale allows you to accurately measure both the coffee grounds and the water, ensuring that you replicate your favorite brewing ratios with ease.
Consistency is key to achieving repeatable results, and a scale eliminates guesswork. A scale with a resolution of 0.1 grams is ideal for measuring coffee grounds. It’s also helpful to have a scale with a built-in timer to track the brewing time accurately. Even a basic kitchen scale will improve the quality of your coffee. By weighing your ingredients, you gain control over the brewing process.
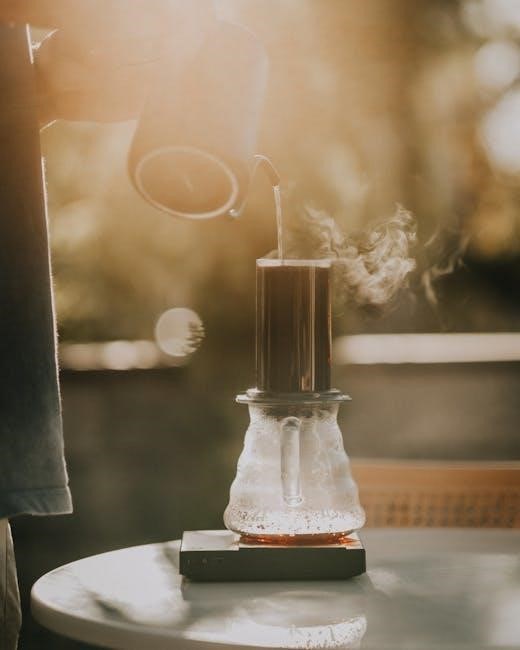
Step-by-Step AeroPress Brewing Instructions (Inverted Method)
The inverted method allows for a longer steeping time and prevents dripping before pressing. Follow these steps for a rich, full-bodied AeroPress coffee using this popular technique.
Preparing the AeroPress (Setting up)
Before you begin brewing, it’s essential to properly prepare your AeroPress for the inverted method. This involves assembling the components and ensuring everything is clean and ready for use. Start by taking the AeroPress and inserting the plunger into the brewing chamber, but only to about the 4 mark. This will create an airtight seal when you flip it over.
Next, take your paper filter and place it into the filter cap. Rinse the filter with hot water to eliminate any paper taste. Screw the filter cap onto the brewing chamber. Your AeroPress is now ready for the inverted brewing process. This setup is crucial for a successful and mess-free brewing experience.

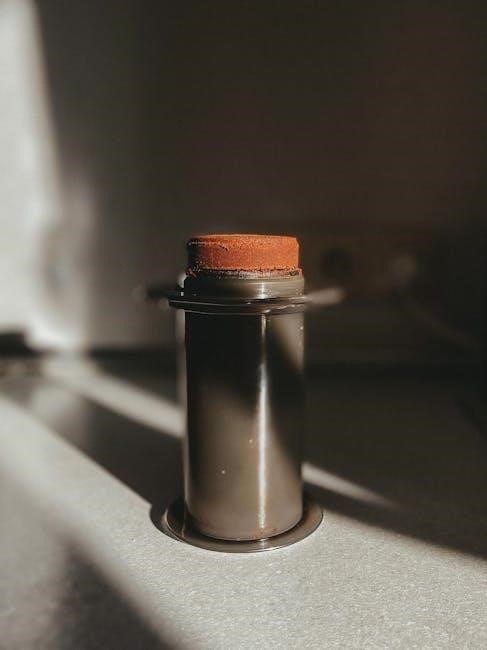
Adding Coffee Grounds (Dosage)
Achieving the perfect cup with your AeroPress hinges on the correct coffee dosage. A general guideline is to use around 14 to 17 grams of medium-fine ground coffee. However, this can be adjusted to suit your taste preferences. If you prefer a stronger brew, increase the amount of coffee slightly. For a milder taste, reduce the dosage accordingly.
Use the AeroPress scoop, or a scale for more accuracy, to measure out your grounds. Pour the coffee into the inverted AeroPress chamber, ensuring it settles evenly. Experimentation is key to finding your ideal dosage, so don’t hesitate to adjust the amount until you achieve your desired flavor profile. Consistency in measurement will lead to consistent results.
Pouring Water and Blooming
Once your coffee grounds are in the AeroPress, it’s time to add water. Aim for a water temperature between 175-185°F (80-85°C). A crucial step is the “bloom,” where you pour a small amount of water (about twice the weight of the coffee) over the grounds and let it sit for around 30 seconds. This allows the coffee to degas, releasing trapped carbon dioxide and enhancing flavor extraction.
After the bloom, slowly pour the remaining water to reach your desired brewing ratio. A common ratio is 1:15 (coffee to water), but feel free to experiment. Ensure all the grounds are saturated evenly. This step is essential for a balanced and flavorful cup of AeroPress coffee.
Stirring the Coffee
After adding the water, it’s important to stir the coffee grounds to ensure even saturation and extraction. Use a paddle or spoon to gently stir the mixture for about 10 seconds. This helps break up any clumps of coffee and allows the water to fully interact with all the grounds, promoting a more consistent and flavorful brew.
Avoid stirring too vigorously, as this can lead to over-extraction and a bitter taste. A gentle and thorough stir is all that’s needed. Ensure that all the coffee grounds are fully submerged in the water to maximize the brewing potential. Stirring is a small but crucial step for a well-rounded AeroPress coffee.
Steeping Time
Steeping time is a critical factor in controlling the flavor of your AeroPress coffee. After stirring, allow the coffee to steep for a specific duration, typically ranging from 30 seconds to 2 minutes. The exact time will depend on your personal preference and the coffee beans you are using. Longer steeping times generally result in a stronger, more intense flavor, while shorter times produce a brighter, more acidic cup.
Experiment with different steeping times to find the sweet spot that suits your taste. Use a timer to ensure consistency in your brewing process. Remember that steeping time, alongside grind size and water temperature, is a key element in crafting the perfect AeroPress brew.
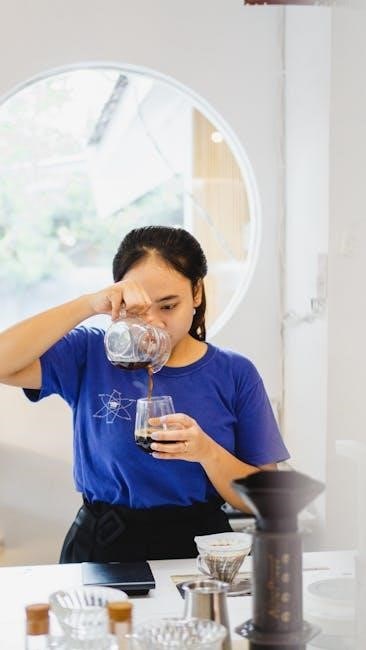
Inverting and Pressing
Once the steeping time is complete, carefully invert the AeroPress over your coffee mug or server. Ensure the mug is stable and positioned directly beneath the AeroPress. Now, begin pressing down on the plunger with a slow and steady force; Avoid pressing too quickly, as this can lead to a bitter taste in your coffee.
Apply consistent pressure until you hear a hissing sound, indicating that all the water has been forced through the coffee grounds. Stop pressing at this point to prevent any unwanted flavors from being extracted. The pressing process should take approximately 20-30 seconds. Remove the AeroPress from your mug and enjoy your freshly brewed coffee.

Cleaning and Maintenance
Maintaining your AeroPress is crucial for longevity and optimal performance. Regular cleaning prevents residue buildup, ensuring consistently delicious brews. Proper storage also protects the components. Follow these simple steps to keep your AeroPress in top condition.
Cleaning After Each Use
To maintain your AeroPress and guarantee its long-lasting performance, cleaning after each use is absolutely essential. This simple habit prevents the accumulation of coffee oils and residue, which can affect the taste of future brews. Immediately after pressing, remove the cap and push the plunger to eject the coffee grounds. A quick rinse under fresh water is usually sufficient for the silicone plunger end.
Ensure you rinse all parts thoroughly, including the chamber, plunger, and filter cap. This prevents any lingering flavors from impacting your next coffee. Allowing the components to air dry completely is highly recommended before reassembling and storing your AeroPress. This practice keeps your AeroPress in pristine condition.
Storing the AeroPress
Proper storage is key to protecting your AeroPress and extending its lifespan. After cleaning and ensuring all parts are completely dry, reassemble the AeroPress partially. Insert the plunger into the chamber, but not all the way down; this allows air circulation and prevents moisture buildup. This ensures that no mold or unwanted smells develop inside the device.
Consider using an AeroPress organizer stand to keep all the components neatly together and readily accessible. Store the AeroPress in a dry place, away from direct sunlight and extreme temperatures. This protects the plastic from degradation. With proper storage, your AeroPress will always be ready for your next delicious brew, maintaining its condition for years.
Troubleshooting Common Issues
Even with careful brewing, issues can arise. This section addresses common AeroPress problems and provides solutions. Learn how to diagnose and fix slow pressing, bypassing, and other challenges to achieve perfect coffee consistently.
Slow Pressing
Encountering slow pressing is a common issue during AeroPress brewing. This frustrating problem can stem from several factors, hindering the extraction process and potentially affecting the coffee’s flavor profile. One primary cause is using coffee grounds that are too fine. Finely ground coffee can clog the filter, creating excessive resistance and making it difficult to press the plunger down. Adjusting the grind size to medium-fine typically resolves this issue.
Another potential culprit is insufficient water temperature. If the water is not hot enough, it may not effectively saturate the coffee grounds, leading to a slower extraction and increased resistance during pressing. Ensure the water is heated to the recommended temperature range (around 175-185°F or 80-85°C) for optimal results. Additionally, using too much coffee relative to the water can also contribute to slow pressing. Experimenting with slightly reducing the coffee dosage can alleviate this problem. Lastly, check the filter for any clogs or damage that might be impeding the flow of coffee.
Bypass (Coffee Leaking)
Bypass, or coffee leaking around the seal during brewing, is another common issue that can affect the consistency and quality of your AeroPress coffee. This unwanted leakage occurs when coffee and water escape outside the intended brewing path, leading to an uneven extraction and a weaker, less flavorful cup.
One primary cause of bypass is an improper seal between the AeroPress chamber and the plunger. Ensure the plunger’s rubber seal is clean and properly lubricated to create a tight fit. Applying a small amount of food-grade silicone grease can significantly improve the seal. Overfilling the AeroPress chamber can also cause bypass, as excessive pressure forces coffee and water past the seal. Adhering to the recommended water and coffee ratios is crucial. Additionally, ensure the filter cap is securely attached to the chamber. A loose or damaged cap can compromise the seal and allow coffee to leak. Inspect the cap for any cracks or deformities that may hinder its ability to create a tight closure.
Advanced Tips and Techniques
Ready to elevate your AeroPress game? Explore advanced techniques to unlock the full potential of your brew. Experiment with grind size, water temperature, and brewing ratios for unique flavors.
Adjusting Grind Size and Coffee Amount
The grind size significantly impacts the extraction and taste of your AeroPress coffee. A finer grind offers more surface area, leading to faster extraction. However, an overly fine grind can cause slow pressing or bitterness. Conversely, a coarser grind results in weaker, sour coffee due to under-extraction.
Experiment with grind settings to find the sweet spot that balances extraction and flavor. Start with a medium-fine grind, similar to table salt, and adjust based on your taste preferences. Also, manipulate the amount of coffee grounds used. More coffee generally leads to a stronger brew, but it can also affect pressing time. Adjusting these parameters allows precise control over your final cup.
Experimenting with Water Temperature
Water temperature is a crucial factor in extracting the desired flavors from coffee grounds during AeroPress brewing. Higher temperatures generally lead to faster extraction, potentially resulting in a more robust and intense flavor profile. However, excessively hot water can also extract undesirable bitter compounds, compromising the overall taste. Lower water temperatures, on the other hand, result in slower extraction, yielding a milder and potentially sour cup of coffee.
The ideal water temperature for AeroPress brewing typically falls between 175°F and 185°F (80°C to 85°C). Experiment within this range to discover your personal preference. Consider using a thermometer for accurate measurements.
Exploring Different Brewing Ratios
The brewing ratio, which is the proportion of coffee grounds to water, significantly influences the strength and flavor of your AeroPress coffee. A higher ratio (more coffee, less water) results in a concentrated brew, similar to espresso, while a lower ratio (less coffee, more water) produces a weaker, more diluted cup.
A common starting point is a 1:15 ratio, meaning 1 gram of coffee for every 15 grams of water. However, don’t hesitate to deviate from this standard! Experiment with ratios ranging from 1:12 for a bolder flavor to 1:18 for a lighter, more nuanced taste. Adjust the ratio to match your preferences and the characteristics of your coffee beans.


Leave a Reply
You must be logged in to post a comment.